Serve Screen Buttons
This where the user selects how the student is paying—Credit, Cash or Check. The user can also view and Void Student Historical Transactions here.
Complete Meal Transaction Buttons
- Click/Touch
 if the student is paying with a debit or credit card at the register.
- These transactions will have an Item ID of PCRE elsewhere in the software.
- Any warning messages that appeared with pay by Account, will apply when paying by Credit and these transactions are treated similarly to prepayments from K12PaymentCenter.com on daily deposits, reports, etc.
- If the button is grayed out, it’s read-only, so go to Administration: System Settings: User Role Access to check the box to activate the button.
This setting is district-wide. To have the button be available for some sites, and not others, you will need to create a new user group (i.e. Cashier with debit/credit) for those sites to use the Credit button.

-
Click/Touch
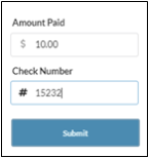
 if the student is paying by check. If the Amount of the check is for more than the Total Due, any remaining monies will be added to the student’s Account/Balance.
-
Enter the amount of the check in the Amount Paid field.
-
Enter the check number in the Check Number field.
-
-
Click/Touch
 if you are giving the change back to the student.
-
 Shortcut: If they are paying exact cash, you can click/touch Cash before any $ buttons to check out immediately. (You do not need to enter the Amount Paid if you use the Cash button.)
 -
If they are not paying anything, just click/touch Account and it will be processed as a Charge or Prepay Used.
-
If a cash drawer has been enabled, the cash drawer will automatically open with the Cash or Account button is selected.
-
-
Click/Touch
 to apply the change to the student’s Account Balance.
-
If a cash drawer has been enabled, the cash drawer will automatically open with the Cash or Account button is selected.
-
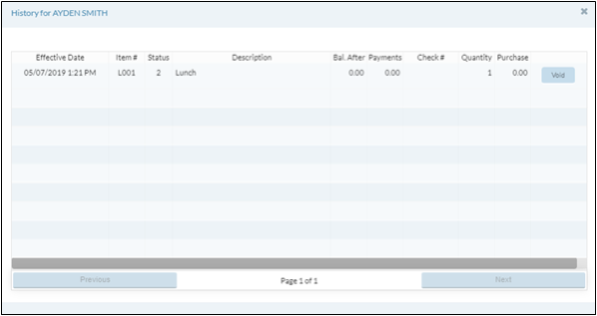
Student Historical Transactions
- Select a student in the queue and click/touch
 the button to display the completed Serving transactions, with the most recent on top.

- Highlight a transaction in the grid and click the
 button to Void a historical transaction. A warning message appears.

- Confirm voiding the transaction.
- Click Yes to void the transaction.
- Click No to leave the transaction and return to the previous form.
©2021 EMS LINQ Inc.
Meals Plus Web Help, 10/2019